XCFramework + SwiftPackageManager

You’ll read an article about how to make Framework, XCFramework, how to make Swift Package Manager, and how to use XCFramework with Swift Package Manager. I’ll cover all topics from the beginner level. I assume that you’ve basic knowledge of SwiftPackageManager and XCFrameworks.
First of all, I recommend to you watch 2 videos from developer.apple.com
The first video Binary Frameworks in Swift and the second one is Distribute Binary Frameworks as Swift Packages , you will like these videos I think, they are delicious 🍎
Yup, let’s start, when you read some articles about XCFramework, you must see the pre-compiled word in one of these articles, precompiled describe XCFramework, it’s basically a binary package of Apple worlds. You can see the key differences between them by looking at them in the Xcode Project navigator.


Please focus Logger on the left image and LoginModule on the right image. Logger is a simple Swift Package, and LoginModule in the right is a simple XCFramework — binary package. You can look at the all includes, sources, and resources of SwiftPackage, but did you see that LoginModule is kinda like a locked box? So it’s a binary package newly named XCFramework which you can share your code as binary and nobody can see your code. SwiftPackageManager is really cool and easy to use, now we can XCFrameworks with it, so why we don’t use it?
We need a scenario to build something
I made a scenario to build something like that we are paid by X Company to build a ToDo SDK and we have to deliver our SDK to X Company, this ToDo SDK fetches ToDo’s and provides 3rd party login module for our ToDo integration but be careful, it’s just a small module, fetch and login stuff.
Create XCFramework
Like similar steps of the creation of an application for iOS, you will need to create a Framework for iOS first, then we will create our XCFramework!


Do not forget to remember the Bundle identifier of your XCFramework, we will use it later :) Now we successfully created our binary framework but we have to do something
I created a folder named Sources, then in the Sources folder, created Network and Login folders too, create a new Swift file in the Network folder and named it LoginNetwork, then create a Cocoa Touch Class and named LoginViewController and select the also create XIB file then create last of our files as named LoginViewModel. You can see down below what the project structures will be looking.

Let’s look our project files and look at LoginViewController XIB

LoginViewController contains a UIButton on the bottom and UILabel on the top, so this is so basic and meaningless page, but when you look at the IBAction functionality of the button, you will see that there’s a network call for fetching Todo from Todo API.
As I wrote before, I just need a scenario, so do not take the scenario seriously,it’s just a fun framework for the article
Let’s get our hands dirty 🧑🏻💻
So, first of our job is go to ToDoSDK target and select Build Settings, then find Build Libraries for Distribution, set it to YES, then build it.
We need to archive our TodoSDK for the iPhone simulator and iPhone os now, it’s necessary because we will create these archives to combine when we create XCFramework, and then we can use our ToDoSDK with Simulator and also the real device.
Use your terminal and go to the folder of the ToDoSDK
This code will archive our ToDoSDK into Desktop as a .xcarchive folder and as you can see, the target is the iPhone simulator, now we have to use it for real iphoneos.
And this archive command will archive our framework for iPhone os available. Now we have to combine this iPhone simulator + iPhone os archives into just one XCFramework and we can use it with singular XCFramework as a binary package.
Now this command will combine 2 frameworks into one XCFramework. Now we have our XCFrameworks in Desktop named ToDoSDK
Usages of XCFramework
There is more than one usage of the XCFramework for an application, first usage is that you can drag and drop it into your application, and import it to the project, let’s see the screenshot below.

Let’s select copy items if needed and finish, you can import ToDoSDK and use it happily as I do in the tutorial project which you can see below with the screenshot
Benefits of it when you use Swift Package Manager
Guys, did you see that I drag & drop my XCFramework into the project, it’s a cool way but there are cooler ways to use and distribute because these packages must be distributed mostly in the projects, I mean packaging when I talk about distribution, for example, Swift Package Manager or CocoaPods, but we will cover Swift Package Manager for this article, with SPM we will encapsulate it a little bit more, we will add some wrapper classes to reach the functionality of ToDoSDK, some organizations use emails to send this binary packages, it would be cool to use binary packages
Create a Swift Package
After you select thew Xcode icon, select File -> New -> Package. Name it ToDoPackage. Create a folder named artifacts and drag and drop our precious XCFramework into this folder.

Then in the package, you must add ToDoSDK as binaryTarget and also add this binary dependency into our Library which is named ToDoPackage
As you can see in the binaryTarget, there’s the exact name of ToDoSDK and its path, you finally add binary XCFramework to Swift Package but we need to add this binary package as targets for our library as seen in line 13.
Implement Wrapper Functionality
When you open the ToDoPackage folder at the bottom, you will see there’s a swift file named ToDoPackage, remove it and paste the code below.
In the photo, you can see a class and static function named getLoginViewController which returns LoginViewController
If you click the ToDoSDK for info on the return side, you will see just interfaces of all structures of it like below, the implementation and details cannot be seen.
So we are on the right way, keep going…
Did you remember that at the beginning of the article I said that do not to forget the bundle identifier of the Framework?
In here for getting an instance of LoginViewController needs a Bundle, and Bundles are different in SwiftPackage and XCFramework, so for reaching LoginViewController you’ve to put the exact identifier of the Framework, do not forget it.
Right now, we can try our SwiftPackage peacefully at last. There’s more than one way to try our SwiftPackage. First of all, you can push the SwiftPackage into Github and then fetch the package from Xcode with Add Package option, or you can drag and drop, for this article, I am choosing the easy path and using drag & drop.
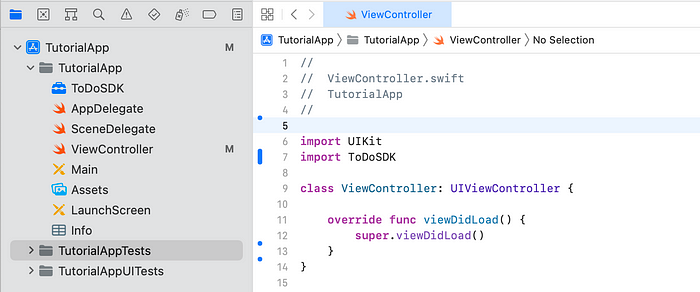
I’ve created an empty app named TutorialApp and dragged&dropped my ToDoPackage into the application.

It should be like that on the project navigator, then in the project target, you have to click the + button into Frameworks, Libraries, and Embedded Content for adding our package to our target, you can see the image below

Then in ViewController’s viewDidAppear, get the LoginViewController from the TodoPackage functionality and present it
And run it from simulator or real device.

The result is perfect.
Click the login button and look for the log, I did and this is the output for me
Todo Todo(id: 1, userId: 1, title: “delectus aut autem”, completed: false)
So we can easily say that at this point, we created Framework, then created binary frameworks named XCFramework and used it with SwiftPackageManager. You can distribute and use XCFramework with Swift Package Manager in an easy way.
What should we do next?
We can use Github for the SwiftPackage repository, with this way we can demand our SwiftPackage not in a drag&drop with local way, but remote way, for this article I did not cover it but it would be fun to use the package in this way as usually, we do.
Thanks for reading the article! I hope you like my article and that it’s helpful and useful. Please feel free to comment about your thoughts, we can discuss it, be safe 🤘🏻

